Tuesday, May 10, 2016

A "Berry" Yummy Backyard Fruit Bar!

This shop has been compensated by Collective Bias, Inc. and its advertiser. All opinions are mine alone. #SienteGlade #CollectiveBias
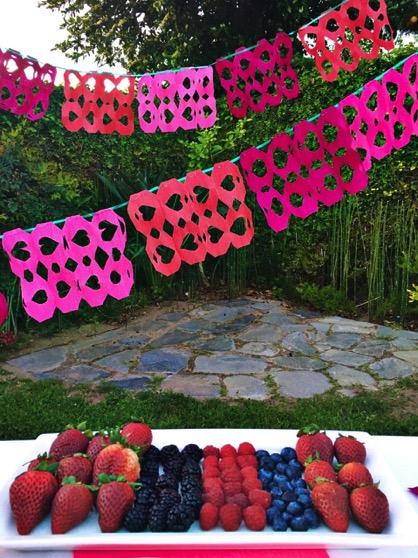
With spring in full bloom, I love to hang out in my backyard in the evenings and enjoy the weather, the plants and the comfort of being at home!
If you’ve been reading my blog, you know I love to create crafty things and my family is pretty big on celebrations: we love holidays, birthdays, special occasions and seasons!
This spring has been particularly special because our family has grown and I’ve spent a lot of time at home! I changed several decorative items around the house and bought the new Glade® Radiant Berries™ Candles at Target to give the house a fresh and bright scent.
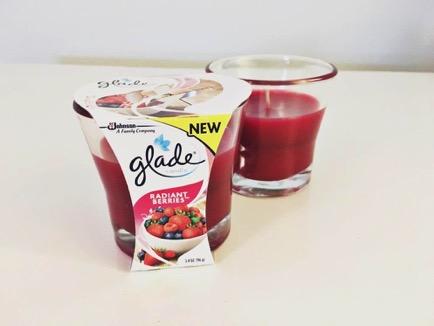
The new Glade® Radiant Berries™ Candles can be found at most major retailers.
Glade® Radiant Berries™ Candles smell soooo good! They even inspired me to have a backyard berry-themed fruit bar for my boys after a late lunch one afternoon. It was like the scent of the candles suddenly released a bright energy into our house!
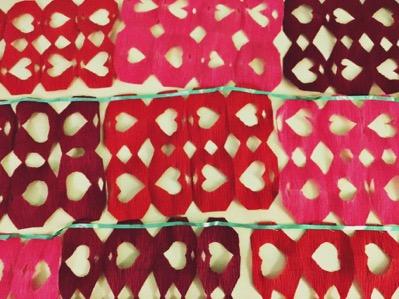
I kid you not, with the scent going around the house I couldn’t help but make something bright, playful,vivid, full of color and culture. So I thought for a minute and decided to make some papel picado banners to decorate our “berry” yummy backyard fruit bar. The idea was to smell the fragrance of Glade® Radiant Berries™ Candles inside the house and enjoy the fresh fruit outside with a vivid rush of bright and bold Mexican decorations!
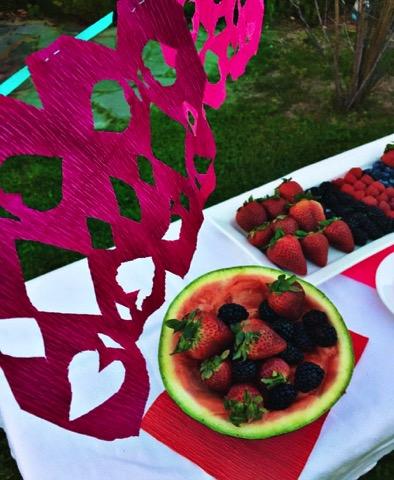
Papel Picado is a popular Mexican party decoration. The streamers are made out of tissue paper and hung across rooms, halls and gardens to add color and fun to parties!
Here is a step-by-step tutorial on how to make simple, individual papel picado streamers. I recommend you use crepe paper instead of tissue paper because although tissue paper is easier to handle and cut, crepe paper is more resistant to wind and natural outdoor debris.
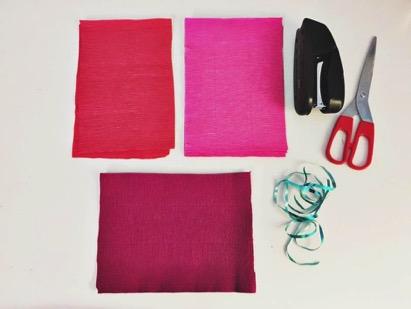
For this project you will need: scissors, string, a stapler and the crepe paper cut into 6” x 8” rectangles. Make sure you cut plenty of crepe paper rectangles for longer streamers. Oh yeah, and have the scent of Glade® Radiant Berries™ Candles in the background and you will also feel that bright energy and use bright pink and red colored crepe paper!
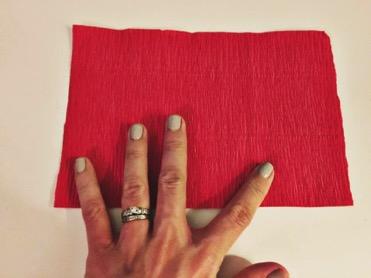

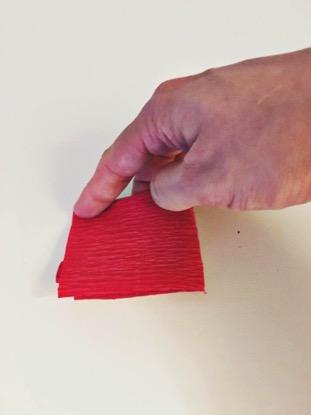
First, you start by folding your rectangle in half. Once folded in half, you fold in half again. Then you grab the ends of the folded rectangle and fold those in half. You will end up with what seems like a small 2” rectangle.
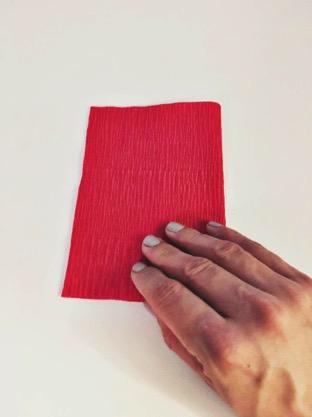
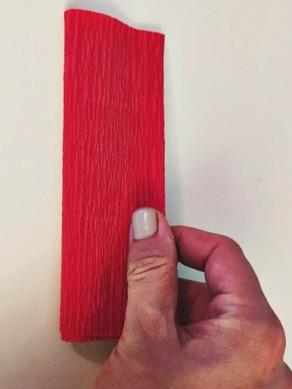
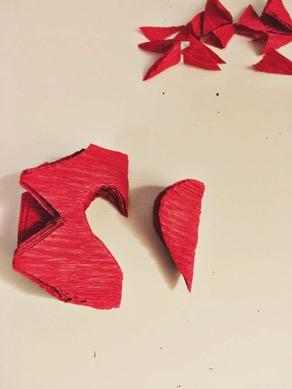
At that point, cut the corners off and your folded rectangle will take the shape of an elongated octagon. On the part of this octagon where the edge is folded, cut a small triangle.
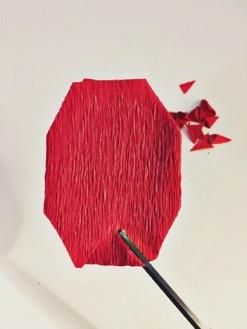
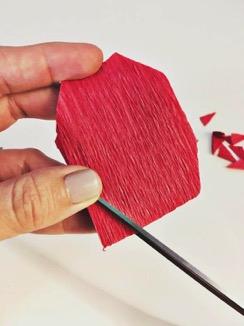
Once the triangle is cut, the top of your folded piece of paper will look like two pointy animal ears. Fold that once again so that the peaks meet the edge of the shape.
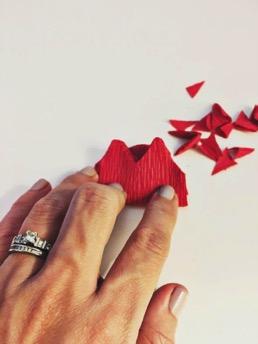
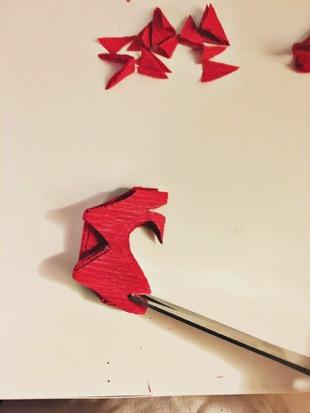
On the folded side of this smaller shape, cut out half of a heart shape. In the small areas above and below your heart cutout, use the scissors carefully to cut tiny little triangles.
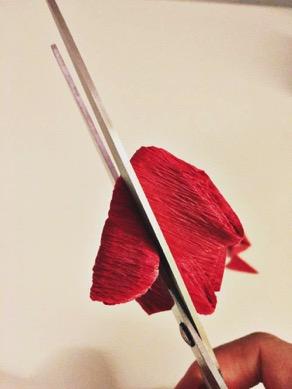
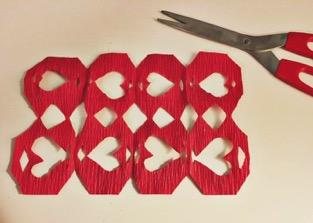
Once that’s done, you can start unfolding your rectangle until it’s fully laid out.
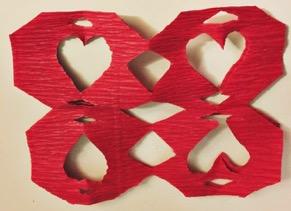
You repeat this process until you have enough rectangles to complete a banner with the length of your choice. In order to string the papel picado rectangles, you simply place the string over the top edge of each piece and staple it in place!
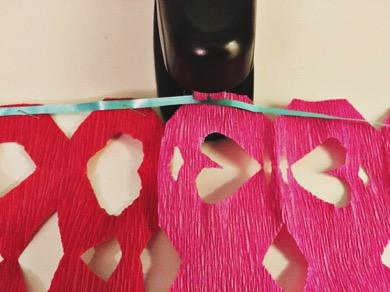
These are not the most elaborate papel picado streamers but they’re fairly easy to make and they sure add bright and playful energy to any festive set-up!
How do you turn family nights into fun, colorful memories? Please share!
Also, make sure to visit the Glade® Facebook page for more information on the different Glade® Radiant Berries™ products available!
Feel Bright. Feel Glade®
Thanks for reading!


En español
Con la primavera en su mero apogeo, me encanta pasar el rato en el jardín y disfrutar del clima, las plantas y la comodidad de estar en casa!
Si ha estado leyendo mi blog, sabrá que me encantan las artesanías y a mi familia le encanta las celebraciones: los días feriados, los cumpleaños, ocasiones especiales y las estaciones del año!
Esta primavera ha sido particularmente especial porque nuestra familia ha crecido y he pasado mucho tiempo en casa! He cambiado varios elementos decorativos alrededor de la casa y compré las nuevas velas con fragancia  Glade® Radiant Berries™ en Target para darle a la casa un nuevo aroma.
¡El olor de las Glade® Radiant Berries™ Candles es riquísimo! Incluso me inspiró a coordinar una pequeña barra de frutas para mis hijos y mi esposo después de la comida. Fue como si el aroma de las velas de repente lanzó una enorme dosis de pasión y energía en la casa.
No les exagero, con el aroma por toda la casa, no pude evitar el deseo de hacer algo divertido, lleno de color y cultura. Así que pensé por un momento y decidí hacer pancartas de papel picado para decorar nuestra barrita de frutas en el jardín. La idea era oler la fragancia de Glade® Radiant Berries™ dentro de la casa y disfrutar de la fruta fresca afuera con detalles coloridos que representaran nuestra cultura! 
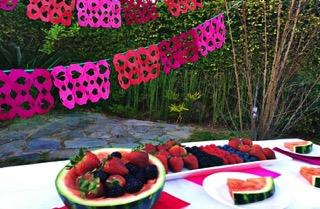
El papel picado es una decoración popular mexicana. Las banderitas están hechas de papel chino y se cuelgan a través de las habitaciones, salones y jardines para añadir pasíon, color y diversión a las fiestas.
Aquí les comparto un tutorial sobre cómo hacer serpentinas individuales y sencillas de papel picado. Les recomiendo que usen papel crepé en lugar de papel chino ya que si bien el papel chino es más fácil de manejar y cortar, el papel crepé es más resistente al viento y las condiciones del aire libre.
Para este proyecto se necesita: tijeras, listón, una grapadora y el papel crepé cortado en rectángulos de 6 "x 8" pulgadas. Asegúrese de cortar suficientes rectángulos de papel crepé para lograr serpentinas largas. Ah, , se me olvidaba comentar que si tienen el aroma de Glade® Radiant Berries™ de fondo, tal vez también sientan esa energia y opten por usar papel crepé de tonos rosa y rojo brillante para evocar pasión.
Para comenzar, se empieza doblando el rectángulo por la mitad. Una vez doblado por la mitad, se dobla por la mitad otra vez. A continuación, tome los extremos del rectángulo doblado y los pliegues y doble por la mitad. Va a terminar con lo que parece ser un pequeño rectángulo.
En ese punto, corten las esquinas y su rectángulo doblado tomará la forma de un octágono alargado. En la parte de este octógono, donde se dobla el borde, cortar un pequeño triángulo.
Una vez que se corta el triángulo, la parte superior de la hoja de papel doblado se verá como dos orejitas puntiagudas. Doblar una vez más de modo que los picos se reúnan con el borde de la pieza.
En la parte doblada de esta figura más pequeña, cortar la mitad de un corazón. En las pequeñas áreas por encima y por debajo de su recorte del corazón, usar las tijeras para cortar cuidadosamente diminutos triángulos.
Una vez hecho esto, puede comenzar a desplegar su rectángulo hasta que esté totalmente distribuido.
Puede repetir este proceso hasta que haya suficientes rectángulos para completar una pancarta con la longitud que usted desee. Con el fin de completar una cadena de los rectángulos de papel picado, basta con colocar el listón sobre el borde superior de cada pieza y engrapar para que todo quede en su lugar y esté listo para colgarse!
Estan no son las serpentinas de papel picado más elaboradas, pero son bastante fáciles de hacer y seguro que le añaden una energiá refrescante y un toque de pasión a cualquier festejo!
¿Ustedes cómo convierten noches de familia en recuerdos coloridos y divertidos? ¡Por favor compartan!
Además, asegúrense de visitar la página de Facebook Glade® para más información sobre los diferentes productos del aroma Glade® Radiant Berries™
Siente Pasión. Siente Glade®


¡Gracias por leer!

Saturday, April 2, 2016

Easy DIY Yarn Eggs


Making these yarn eggs was fun but a bit messy too. 
I made them to display a bit of Easter decor at home since I love to celebrate all holidays but haven't done much since baby Toby arrived (I didn't decorate for St. Patrick's Day at all).
The nice thing about this craft is that you don't have to make oval shaped spheres (er, Easter Eggs). You can make round spheres for a Spring, Summer or Winter party... and they add a nice decorative touch to any soirée. Plus, they're easy to make.

You only need: scissors, yarn, balloons, glue & water.  


Instructions: 
Blow up the balloons and set aside (I used small water balloons).
In a small bowl, mix one part glue with two parts water. For example, 1/2 cup of glue would be mixed with 1 cup of water.
Cut a long piece of string, enough to go around the balloon several times.
Soak the string inside the glue mix, then start wrapping around the balloon, creating fun designs around the circumference of the balloon. Repeat as many times as necessary to get the desired look.
Because of the element of water, this activity tends to get messy, so make sure you have a washcloth nearby to wipe the surface of your work area. 


When you reach the end of a string, apply glue to the end of the string and attach to another part of the wet string before continuing with the next piece. 
Find a place to hang your yarn creations so they can thoroughly dry (This usually takes a few hours, I dried them overnight with a clasp hanger).
You'll need the yarn to be completely dry before you proceed to the next step.
Once the yarn is dry, you'll notice it's a little stiff. At that point, use a sharp item, like a needle to pop the balloon.


Once the balloon is completely deflated, you can pull it out through one of the many orifices on the yarn sphere.
Then you can decorate the eggs by placing stickers on them or leave them plain for simplicity.


Enjoy!

Friday, December 11, 2015

Zebra Head Christmas Tree Topper Tutorial


For our "Wild and Fabulous" zebra-themed Christmas, I thought it would be appropriate to make a zebra head Christmas Tree topper.
The project went on a little longer than I intended but it finally got done tonight.
It's all just a matter of gathering all the materials and having lotsa' patience, especially if you have kids who want to be involved but don't quite have a grasp on crafting projects that are a bit more complicated than preschool crafts (hehe).
To do a similar Zebra head, this is what you will need:
1. Newspaper
2. Masking Tape
3. An old book
4, Modge Podge
5. Paint brushes
6. Sponge brushes
7. Paper towels
8. cardboard
9. Scissors
10. Black paint
11. Flour
12. Water

1. This is how I started my project: Just newspaper and masking tape. I made two balls out of newspaper (one slightly smaller than the other one, which would become the zebra's muzzle)

2. Once you have the shape of the head with the newspaper balls connected with masking tape, you can mold the paper with your fingers so it takes on the desired shape.

3. For this project, I made a pot full of homemade paste. In Spanish it's called "engrudo". I boiled three cups of water and added a cup of flour to the boiling water and three tablespoons of sugar and mixed the ingredients until it reached a creamy consistency.

4. This is what it looked like when it was done. It lasts up to a week before mold starts growing out of it, so make sure you time your projects accordingly.

5. I cut pieces of paper towels and dipped them in the homemade paste and basically started covering the newspaper zebra head with the wet paper towels.

6. I cut a piece of cardboard paper to glue to the back of the zebra head for support.
7. The next day, once the homemade glue had dried, I bunched up strips of newspaper and taped them to the top of the animal head to create the zebra's mane.

8. I also rolled up smaller pieces of paper towel to create small rings for the zebra's nostrils and eyelids.

9. I cut small pieces of cardstock paper into triangle-like shapes for the ears and taped them right above the eyes.


10. Once the ears were taped, I added another layer of paper towels with homemade glue all over the zebra.

11. Once the glue was dry, I found a very old book (a thesaurus) and cut small pieces from its pages. This was done to give the zebra a more artsy black and white look, before painting the stripes. The pieces of paper from the book were Modge Podged throughout the zebra head.

My little helper loved this part of the project, he would dip the sponge brush and lather heavy coats of Modge Podge (eek!)


12. The printed pieces took about two hours to dry. Once they were done, I started painting the zebra's features. I used black acrylic paint.

13. The stripes were the fun part. They look a bit messy because I couldn't find a better brush but you get the point!. I created random lines and patterns around the eyes and down the neck. 

And here is my final product. It's ready to sit atop of our Christmas Tree. 
It's certainly not a masterpiece but it's a very inexpensive project to complete.
Thanks for reading!

Tuesday, December 1, 2015

Mi Casa es Su Casa…Ideas for a Thanksgiving-themed Housewarming Party!

This shop has been compensated by Collective Bias, Inc. and its advertiser. All opinions are mine alone. #SienteGlade #CollectiveBias


Glade1.JPG

We are finally settling into our new home!
There are still many things that need to be done, but based on our conversations with other homeowners, we’re not alone— as soon as a project is completed, there’s a new one that will need attention!

As the holidays approach, I thought it would be a great idea to plan a small Housewarming Party letting our friends and relatives know that Mi casa es su casa, which is a popular Spanish phrase that literally means "my house is your house".

Glade3.JPG


I thought it would be appropriate to make this party a Thanksgiving-themed, because we’re very thankful for so many amazing things that have happened in our lives this year and because the Thanksgiving holiday is right around the corner. 
I figured most people have Thanksgiving dinner plans but why not host a pre-Thanksgiving soiree, minus the turkey and stuffing, right?

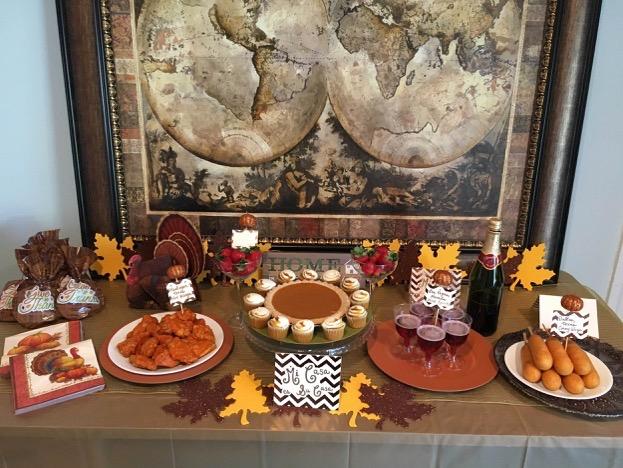
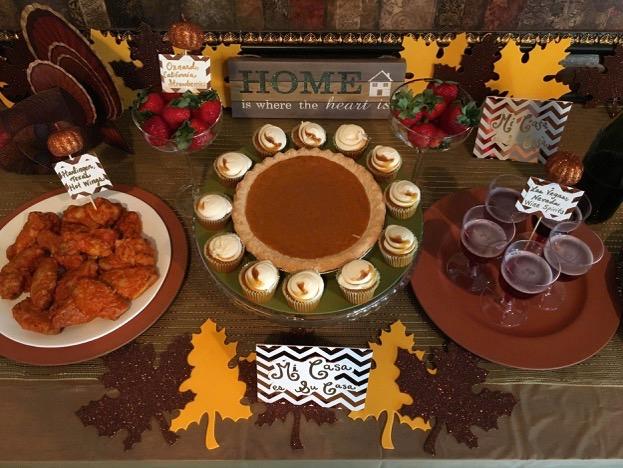
Further, in order to make it extra special, I thought about organizing an appetizer table that features small bites reminiscent of the different places we’ve lived.

Glade5.JPG

Before beginning on the decorations and details, my priority was to make the house a place where guests will feel alegria (joy). I felt the best way to do that was to welcome guests into an environment with a holiday scent!
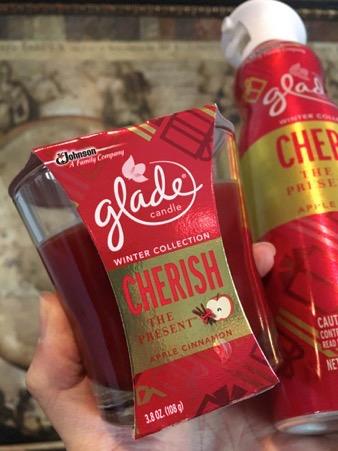
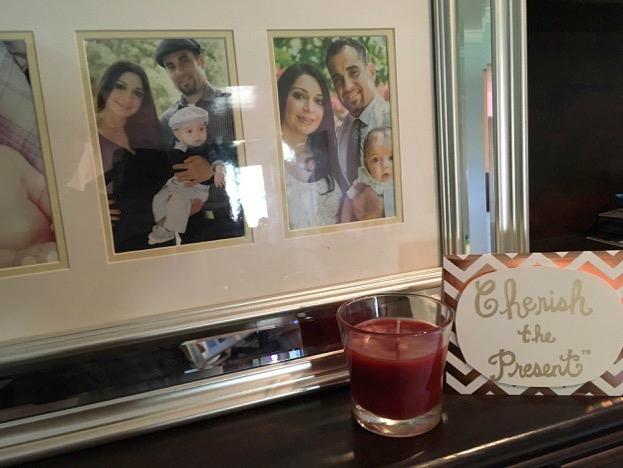
On a recent trip to Target, I found the limited edition Glade® Winter Collection  and fell in love with all the scents. I purchased Cherish the Present ™ with hints of apple cinnamon. And when I lit the candles and our house finally smelled like a home. Both my husband and son couldn’t stop smiling. 

There’s no doubt Glade® helped us to feel the joy of being at home!

Glade6.JPG
Glade® Cherish the Present ™ with hints of apple cinnamon candles and the premium room spray made perfect sense to have for our housewarming because that’s exactly what we’re doing—we’ve lived in so many cities that we’re cherishing this moment of finally settling in Los Angeles County and have the chance to give thanks for the warmth and love of the season!

When I finished setting up, my housewarming appetizer table was all done and the warmth of the aroma of the limited edition Glade® Cherish the Present ™ candles with hints of apple cinnamon candles could be smelled throughout the house, it was pure alegria! We all got into the Holiday spirit and had tons of stories to tell about our history moving from one city to the next in the last ten years!

Glade7.JPG

I’m sharing ideas on how to make a similar Thanksgiving-themed Housewarming party that will be a great conversation starter. I must say though, before doing anything, you should definitely consider one or two of the Glade® Winter Collection scents. To learn more about the limited edition Glade® Winter Collection visit their Facebook page here.

The aromas of Glade® will help you set the mood and spread joy to all your guests.

And now you can take advantage of a special offer when purchasing Glade® products, see coupon offer HERE. Don´t forget to visit also the Siente Glade® Social Hub where you will find cheerful ideas for the holiday season.

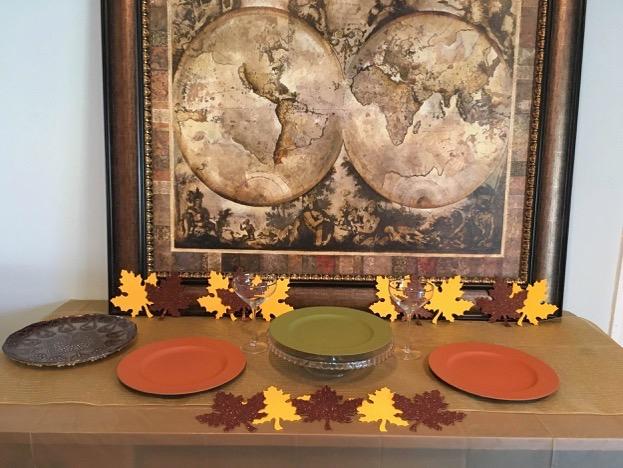
For this housewarming themed party, I started out by using a big world frame as the background to my table. If you don’t have one, you can also use a map of the United States or a map of your city if you’ve lived in the same city but happened to move to a new neighborhood.


Glade2.JPG

I purchased several Thanksgiving decorations and the limited edition Glade® Winter Collection at Target. These decorations included harvest-colored plates, napkins, decorative pumpkins and paper for food labeling.

Glade14.JPG

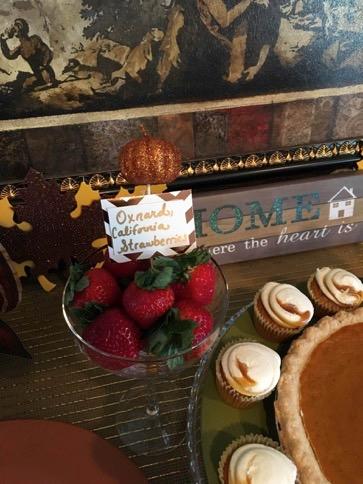
Next I purchased items that reminded my husband and I of each of the different cities we’ve lived. For example, we moved to Oxnard, CA for a brief 6-month period in 2009. Strawberries are very unique to that city because of the many strawberry fields there so I bought fresh strawberries as one of the snacks.

Glade8.JPG
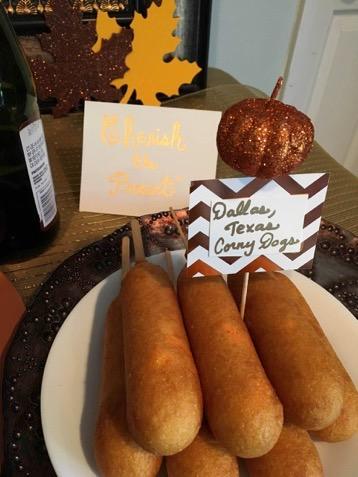
In Dallas, we would go to the Dallas County Fair each year and enjoy their delicious corn dogs, also called “Corny Dogs”, so I offered corny dogs as another appetizer choice.


Glade11.JPG
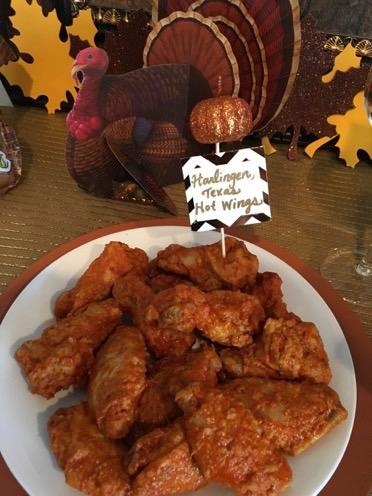
And when we lived in Harlingen, Texas, we would frequently visit a chicken wing restaurant and couldn’t help but offering chicken wings to celebrate our “Harlingen Days”.

Glade9.JPG
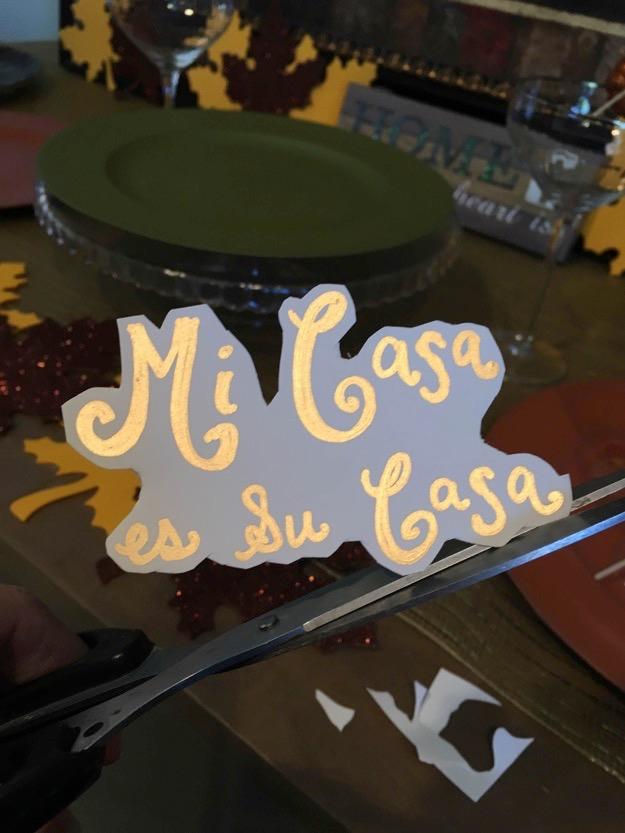
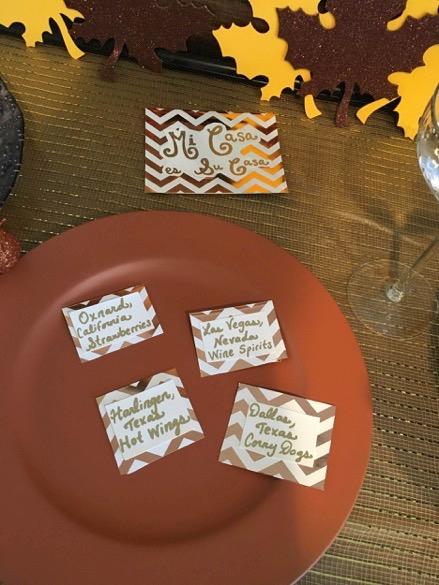
If you ask me, this is a great way to share with guests the favorite bites and small memories of the different places we lived before moving into our new home. And remember, it’s all in the details, so I hand wrote all food labels and glued them onto fall-colored paper with a chevron design.  Again, something like this can become a little time consuming but this is what makes it so memorable. I truly felt like we spread joy and certainly cherished the moment. But most importantly, we made sure same as our parents and grandparents did to show our guests that Mi Casa es Su Casa!
Thanks for reading!

En español
Finalmente nos estamos acomodando en nuestra casa nueva...
Todavía hay muchas cosas que hay que hacer, pero por lo que tengo entendido, en base a conversaciones con otros dueños de casa, no estamos solos- tan pronto como se completa un proyecto, hay un nuevo proyecto que necesita atención.
Así que conforme se aproximan las fiestas, pensé que sería una buena idea planificar una pequeña fiesta para dar la bienvenida a nuestros amigos y familiares a nuestro hogar y dejarles saber que mi casa es su casa, como siempre me lo inculcaron mis padres y abuelos.  ¡Y tener la oportunidad de dar las gracias por la calidez y el amor de la temporada!
Pensé que sería apropiado que la fiesta tuviera una temática del día de Acción de Gracias o Thanksgiving, una fiesta importante en Estados Unidos, y porque estamos muy agradecidos por tantas cosas maravillosas que han sucedido en nuestras vidas este año. Y también porque acabamos de celebrar el día de Acción de Gracias. Me imaginé que la mayoría de los invitados ya habrían disfrutado de una cena de Acción de Gracias, así que ¿por qué no hacer una fiesta sin tanta complicación y sin el pavo, no creen?
Además, con el fin de darle un toque especial, pensé en la organización de una mesa de aperitivos con bocados pequeños que representan a los diferentes lugares donde hemos vivido.
Antes de comenzar con la decoración y los detalles, mi prioridad era hacer de la casa un lugar donde mis invitados se sintieran recibidos con mucha alegría. Pensé que la mejor manera de hacerlo sería darles una bienvenida con el aroma de las fiestas.
En un viaje reciente a Target, encontré los productos Glade® Winter Collection y me enamoré con todas las fragancias. Compré varios productos incluyendo los aromas de Glade® Cherish the Present ™con notas de canela y manzana en presentación de velas y en aerosol. Y cuando encendí las velas y rocíe el spray en las habitaciones, ayudó a nuestra casa a oler a hogar. Tanto mi marido como mi hijo no podían dejar de sonreír. No hay duda que Glade® nos hizo sentir la alegría de estar finalmente en casa.
El aroma Glade® Cherish the Present ™con notas de canela y manzana es perfecto para el estreno nuestra casa nueva. Porque eso es exactamente lo que estamos haciendo, apreciando el momento en nuestro nuevo domicilio.
Al terminar de arreglar mi mesa de aperitivos, la edición limitada Glade® Winter Collection y el calor del aroma de la velas Cherish the Present ™con notas de canela y manzana se podía oler en toda la casa, era alegría pura en el ambiente.
Ahora les quiero compartir ideas sobre cómo hacer una fiesta para darle la bienvenida a tu nuevo hogar con detalles del día Acción de Gracias. Pero antes de comenzar te invito a que compres uno o dos de los productos de la colección Glade® Winter Collection. Para conocer de los aromas visita su página de Facebook, haz clic AQUÍ
Los productos de Glade® ayudarán a ambientar tu casa y a difundir el espíritu de la alegría a todos los invitados.
Y ahora puedes disfrutar de una oferta especial cuando compras los productos de Glade® mira el cupón de ahorros AQUI. No olvides en visitar la página Siente Glade® Social Hub en donde encontrarás ideas muy alegres para estas fiestas navideñas.
Para iniciar este proyecto coloqué un marco grande con un mapamundi para que sirva de fondo en mi mesa. Si no tienes una marco como estos puedes utilizar un mapa de los Estados Unidos o un mapa de tu ciudad, si has vivido en la misma ciudad  pero te has mudado a nuevo vecindario.
También compré varias decoraciones del día de Acción de Gracias junto con los productos de Glade® en Target. Estas decoraciones incluyen platos, utensilios, servilletas, calabazas decorativas y papel para el etiquetado de alimentos con colores del otoño.
Luego incorporé alimentos para celebrar que nos recordaban a mi marido y a mí de a las diferentes ciudades en donde hemos vivido. Por ejemplo, nos trasladamos a Oxnard, California por un breve período de 6 meses en 2009. Allí las fresas abundan ya que hay muchísimos campos de fresas allí.
En Dallas, disfrutamos mucho de la Feria en donde venden del Condado de Dallas cada año y disfrutábamos de los deliciosos Corny Dogs. Así que mi menú incluye puse unos corn dogs como otra opción de aperitivo.
Y en Harlingen, Texas, nos encanta un restaurante que se especializa en las alitas de pollo y no pude dejar de ofrecer alitas de pollo en mi mesa para celebrar los días en Harlingen.
Yo creo que esta es una buena manera de compartir con los invitados, nuestros platos favoritos de los diferentes lugares en donde hemos vivido antes de mudarnos a nuestro nuevo hogar. Para mi los detalles son lo más importante. Así que escribí a mano los nombres de los bocadillos en las etiquetas y los pegué en papel con un diseño agradable. Estos proyectos pueden ser un poco laboriosos, pero estos detalles hacen el evento más especial.
En esta fiesta sentí que cumplimos el objetivo de difundir alegría gracias a los detalles y las deliciosas fragancias de Glade®. Pero lo más importante, continuamos con las enseñanzas de nuestros padres y abuelos al hacer sentir a nuestros invitados que mi casa es su casa.
¡Gracias por leer!
Glade Latina Holiday Sweepstakes