

Benny’s Birthday party is tomorrow!
At first, I wasn’t sure if I would throw a party for him because a December birthday party is so close to the holidays and well, he won’t necessarily remember when he gets older, and there’s the chance of bad weather and the expense of it all, etc. etc. etc.
But before realizing, I started planning it, one detail at a time. First, I began looking for Spaceship invitations on Etsy but I didn’t find any designs that I loved. I found a Spaceship invitation template on the Martha Stewart website here and tried following the instructions but they didn’t quite turn out as nice as the picture so I ventured on my own and got them to look just the way I wanted.
Materials:
White Cardstock paper
Printer (black toner is all you need)
Sticker labels
Scissors
Glue
U.S. Flags for Embellishing
Instructions:
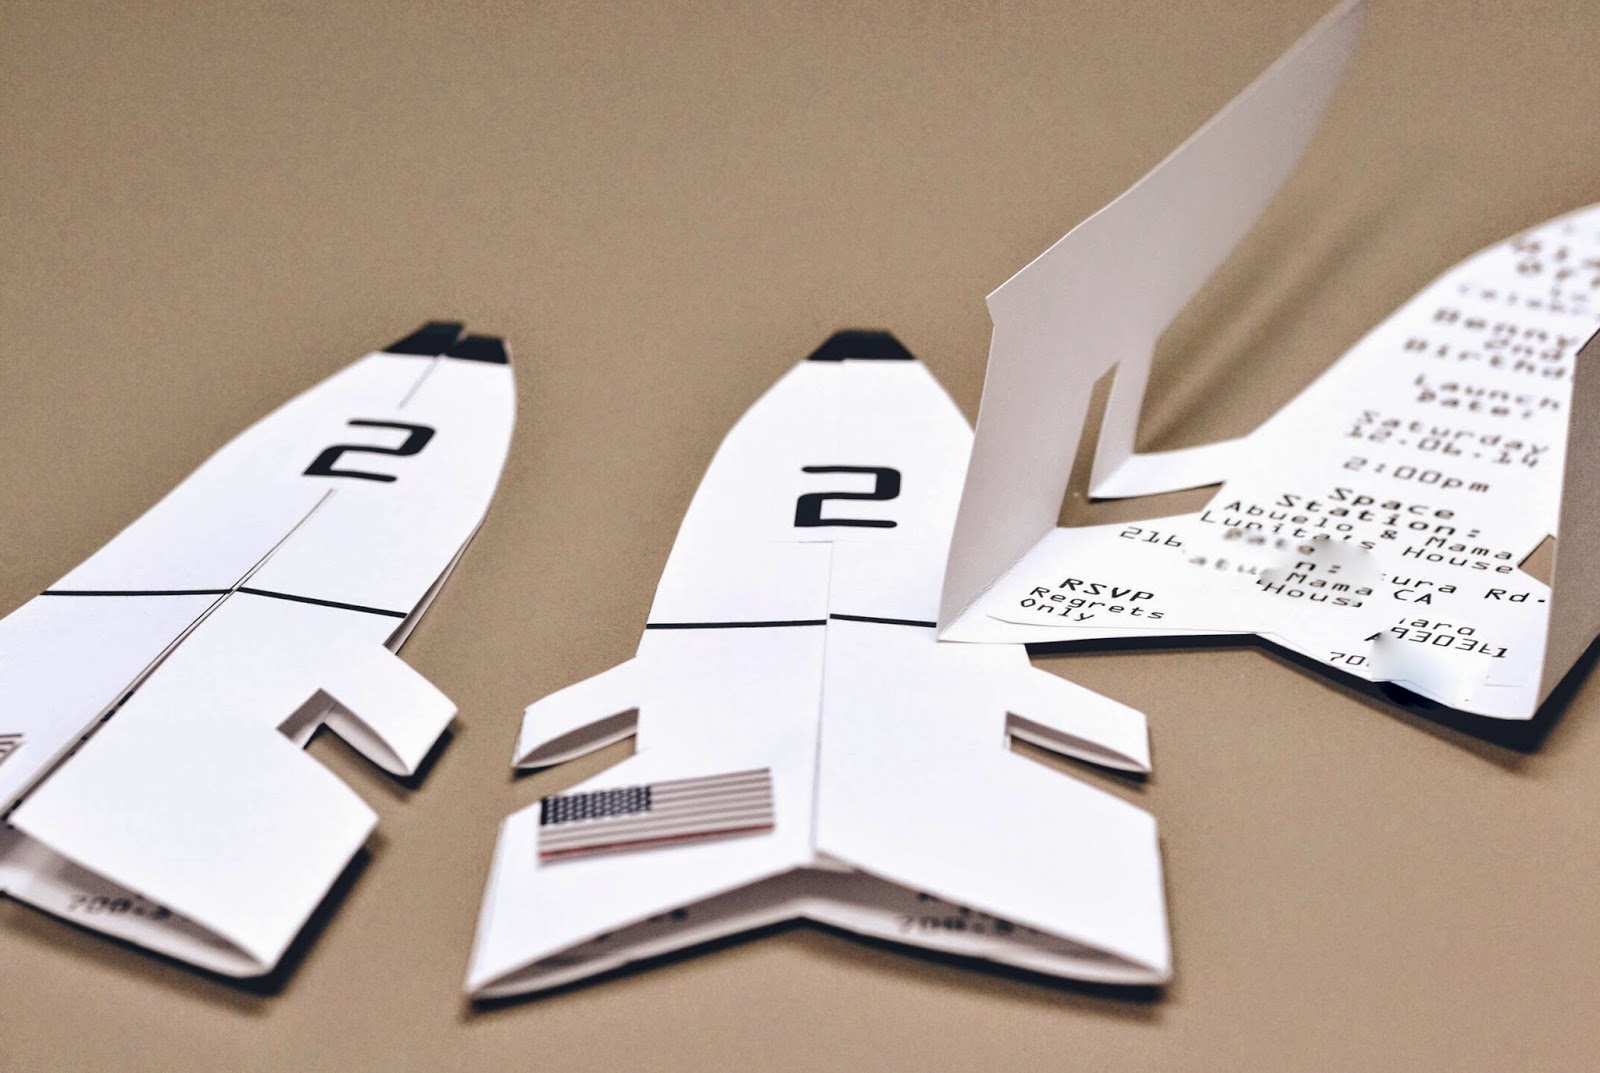
Trace the Martha Stewart template on a regular 8.5 x 11” sheet of paper horizontally. The idea is to be able to fold the ends of the paper so that they meet right at the center of the traced spaceship template. This means you’ll have to cut the sheet of paper in a square and match the ends to fold down the middle of the space ship perfectly. Once you fold the ends, cut along the traced spaceship. This will create the side flaps to look like the Spaceship doors.
In order to avoid wasting paper, I traced another spaceship on the side of the sheet and created the invitation wording to fit perfectly. Then I manually cut each one and glued it inside the invitation. I printed the number “2” on address labels to highlight my son Benny’s age and cut them out individually, The number 2 stickers helped seal the Spaceship doors. Finally, I bought U.S. Flags from the scrapbook section at Michael’s and used to embellish and make the Spaceship a U.S. Spaceship. It’s not a complicated project but it’s definitely time consuming. Feel free to email with questions!
I also made spaceship rockets for the children to play with and came up with several space-inspired party games. I promise to share sometime next week. Now off to Benny’s Party!

 |
| Once I had the size of the square I needed in order to fold the flaps down the middle, I added a thick black line down the center and printed them that way. The black line gave the invites an added touch of 'official rocket' lol! |


En español
¡Mañana es la fiesta de cumpleaños de Benny!
Al principio no estaba segura de celebrarle una fiesta a mi hijito, porque una fiesta de cumpleaños en diciembre es muy cerca a la navidad, porque no la recordará necesariamente, hay la posibilidad de que llueva o haya mal tiempo y los gastos que se hacen con algo así, etc. etc. etc.
Pero antes de darme cuenta, empecé a planearla, detalle por detalle. En primer lugar, comencé a buscar invitaciones con temática de nave espacial en Etsy, pero no encontré ningún diseño que me encantó. Me encontré con un modelo de una invitación de nave espacial en el sitio web de Martha Stewart aquí y traté de seguir las instrucciones pero no me resultó tan bonita como en la foto, así que me aventuré a hacerlas yo sola y salieron hasta mejor, diría yo.
Materiales:
Papel blanco cartulina
Impresora
Etiquetas adhesivas
Tijeras
Pegamento
Banderas de Estados Unidos para decorar las naves
Instrucciones:
Trace la plantilla de Martha Stewart en una hoja de papel regular de 8.5 x 11 horizontalmente. La idea es poder doblar los extremos del papel para que respondan al centro de la plantilla de la nave espacial. Esto significa que usted tendrá que cortar la hoja de papel en una plaza y hacer coincidir los extremos al doblar por la mitad perfectamente en el centro de la nave espacial. Una vez que usted doble los extremos, corte a lo largo de la nave espacial trazada.
Esto creará las aletas laterales que serán las puertas de la nave espacial. Para evitar desperdiciar papel, tracé otra nave espacial en el orilla de la hoja y creé la redacción de la invitación para que encaje perfectamente dentro de la nave.
Yo las corté manualmente y las pegué dentro de la invitación. Luego me puse a imprimir varios números "2" en etiquetas adhesivas que se usan para domicilios. Hice esto para hacer resaltar la edad de mi hijo Benny y para que los numeros ayudaran a sellar las puertas de la nave espacial. Por último, compré calcomanías de banderitas estadounidenses y las coloqué en la nave para que pareciera una nave espacial de Estados Unidos. No es un proyecto complicado pero sí es tedioso.
También hice cohetes de la nave espacial con botellas de agua de plástica para que los niños jueguen e inventé otros juegos para la fiesta espacial. Me comprometo a compartir con ustedes la próxima semana. Ahora vamos a despegar rumbo a la fiesta de mi niño…


No comments:
Post a Comment